Introduction
Building a robust DNS infrastructure is crucial for ensuring high availability and optimal performance for your applications. An anycast DNS setup allows you to deploy multiple DNS servers across different geographic locations while using the same IP addresses, automatically routing queries to the nearest or healthiest server.
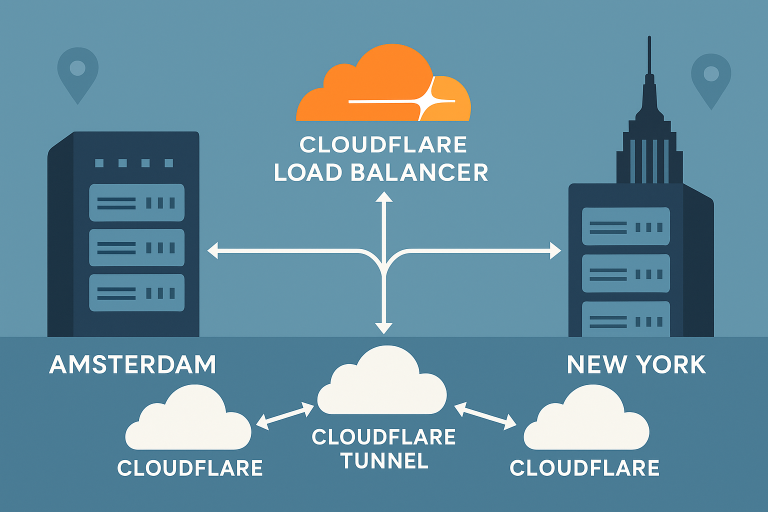
In this comprehensive tutorial, we’ll walk you through creating a production-ready anycast DNS infrastructure using BIND 9 with FRR BGP routing and health-checked failover. You’ll learn how to deploy this setup across Onidel VPS in Amsterdam and New York VPS with full IPv4/IPv6 dual-stack support.
This tutorial covers BGP route advertisement, health monitoring, automatic failover mechanisms, and DNS zone synchronization to create a resilient DNS service that can handle both planned maintenance and unexpected outages.
Prerequisites
Before starting this tutorial, ensure you have:
- Two VPS instances running Ubuntu 24.04 LTS (minimum 2GB RAM, 2 vCPU each)
- BGP ASN and IP address assignments from your upstream providers
- Root access to both servers
- Basic understanding of DNS, BGP routing, and Linux networking
- Upstream BGP sessions configured with your hosting providers
System Requirements:
- Ubuntu 24.04 LTS
- BIND 9.18+
- FRRouting 8.4+
- Python 3.10+ for health check scripts
Note: This tutorial assumes you have proper BGP connectivity established with your hosting provider. Amsterdam VPS vs New York VPS can help you understand the networking implications of each location.
Step-by-Step Tutorial
Step 1: Install BIND 9 and FRRouting
First, update your system and install the required packages on both servers:
# Update system packages
sudo apt update && sudo apt upgrade -y

# Install BIND 9, FRRouting, and monitoring tools
sudo apt install -y bind9 bind9-utils bind9-doc frr frr-pythontools \
    python3-pip htop iftop tcpdump

# Install Python packages for health checking
pip3 install dnspython requests psutil
Enable and configure FRRouting daemons:
# Enable BGP daemon in FRR
sudo sed -i 's/bgpd=no/bgpd=yes/' /etc/frr/daemons
sudo sed -i 's/zebra=no/zebra=yes/' /etc/frr/daemons

# Start and enable FRR
sudo systemctl enable frr
sudo systemctl start frr
Step 2: Configure BIND 9 DNS Server
Configure BIND 9 on your primary server (Amsterdam):
# Create main configuration
sudo tee /etc/bind/named.conf.local <<EOF
// Anycast DNS Zone Configuration
zone "example.com" {
    type master;
    file "/etc/bind/db.example.com";
    allow-transfer { 10.0.1.2; }; // Secondary server IP
    notify yes;
    also-notify { 10.0.1.2; };
};

zone "1.0.10.in-addr.arpa" {
    type master;
    file "/etc/bind/db.10.0.1";
    allow-transfer { 10.0.1.2; };
};
EOF
Create the zone file:
# Create forward DNS zone
sudo tee /etc/bind/db.example.com <<EOF
\$TTL    300
@       IN      SOA     ns1.example.com. admin.example.com. (
                        2024010101      ; Serial
                        3600           ; Refresh
                        1800           ; Retry
                        1209600        ; Expire
                        300 )          ; Negative Cache TTL

@       IN      NS      ns1.example.com.
@       IN      NS      ns2.example.com.
@       IN      A       203.0.113.10    ; Anycast IP
@       IN      AAAA    2001:db8::10    ; Anycast IPv6

ns1     IN      A       203.0.113.10
ns2     IN      A       203.0.113.10
www     IN      A       203.0.113.100
mail    IN      A       203.0.113.101
EOF

# Set proper permissions
sudo chown bind:bind /etc/bind/db.example.com
sudo chmod 644 /etc/bind/db.example.com
Step 3: Configure BGP with FRRouting
Configure BGP to announce your anycast prefixes:
# Configure FRR BGP on Amsterdam server
sudo vtysh -c 'configure terminal' -c '
router bgp 65001
 bgp router-id 10.0.1.1
 neighbor 10.0.0.1 remote-as 64512
 neighbor 10.0.0.1 description "Upstream Provider"
 !
 address-family ipv4 unicast
  network 203.0.113.0/24
  neighbor 10.0.0.1 activate
 exit-address-family
 !
 address-family ipv6 unicast
  network 2001:db8::/48
  neighbor 10.0.0.1 activate
 exit-address-family
!
ip route 203.0.113.10/32 Null0
ipv6 route 2001:db8::10/128 Null0
'

# Save configuration
sudo vtysh -c 'write memory'
Configure the loopback interface for anycast IPs:
# Add anycast IPs to loopback interface
sudo tee /etc/systemd/network/99-anycast.netdev <<EOF
[NetDev]
Name=lo:anycast
Kind=dummy
EOF

sudo tee /etc/systemd/network/99-anycast.network <<EOF
[Match]
Name=lo:anycast

[Network]
Address=203.0.113.10/32
Address=2001:db8::10/128
EOF

# Enable and restart networking
sudo systemctl enable systemd-networkd
sudo systemctl restart systemd-networkd
Step 4: Implement Health Checking and Failover
Create a comprehensive health checker script:
#!/usr/bin/env python3
# /usr/local/bin/dns-health-checker.py

import subprocess
import time
import logging
import dns.resolver
import socket

logging.basicConfig(level=logging.INFO)
logger = logging.getLogger(__name__)

class DNSHealthChecker:
    def __init__(self, test_queries=['example.com'], check_interval=30):
        self.test_queries = test_queries
        self.check_interval = check_interval
        self.consecutive_failures = 0
        self.max_failures = 3
        self.routes_withdrawn = False

    def check_dns_response(self):
        """Test DNS resolution locally"""
        try:
            resolver = dns.resolver.Resolver()
            resolver.nameservers = ['127.0.0.1']
            resolver.timeout = 5

            for query in self.test_queries:
                resolver.resolve(query, 'A')
            return True
        except Exception as e:
            logger.error(f"DNS check failed: {e}")
            return False

    def check_bind_process(self):
        """Verify BIND process is running"""
        try:
            subprocess.run(['systemctl', 'is-active', '--quiet', 'bind9'],
                         check=True)
            return True
        except subprocess.CalledProcessError:
            return False

    def withdraw_routes(self):
        """Withdraw BGP routes on failure"""
        if not self.routes_withdrawn:
            logger.warning("Withdrawing BGP routes due to health check failure")
            subprocess.run([
                'vtysh', '-c', 'configure terminal',
                '-c', 'router bgp 65001',
                '-c', 'address-family ipv4 unicast',
                '-c', 'no network 203.0.113.0/24'
            ])
            self.routes_withdrawn = True

    def advertise_routes(self):
        """Advertise BGP routes when healthy"""
        if self.routes_withdrawn:
            logger.info("Re-advertising BGP routes - service healthy")
            subprocess.run([
                'vtysh', '-c', 'configure terminal',
                '-c', 'router bgp 65001',
                '-c', 'address-family ipv4 unicast',
                '-c', 'network 203.0.113.0/24'
            ])
            self.routes_withdrawn = False

    def run(self):
        """Main health check loop"""
        while True:
            dns_ok = self.check_dns_response()
            bind_ok = self.check_bind_process()

            if dns_ok and bind_ok:
                logger.info("Health check passed")
                self.consecutive_failures = 0
                self.advertise_routes()
            else:
                self.consecutive_failures += 1
                logger.error(f"Health check failed ({self.consecutive_failures}/{self.max_failures})")

                if self.consecutive_failures >= self.max_failures:
                    self.withdraw_routes()

            time.sleep(self.check_interval)

if __name__ == '__main__':
    checker = DNSHealthChecker()
    checker.run()
Make the script executable and create a systemd service:
# Make script executable
sudo chmod +x /usr/local/bin/dns-health-checker.py

# Create systemd service
sudo tee /etc/systemd/system/dns-health-checker.service <<EOF
[Unit]
Description=DNS Health Checker for Anycast
After=network.target bind9.service frr.service
Requires=bind9.service frr.service

[Service]
Type=simple
User=root
ExecStart=/usr/local/bin/dns-health-checker.py
Restart=always
RestartSec=10

[Install]
WantedBy=multi-user.target
EOF

# Enable and start the service
sudo systemctl daemon-reload
sudo systemctl enable dns-health-checker
sudo systemctl start dns-health-checker
Step 5: Configure Secondary Server (New York)
Repeat the installation steps on your New York server, then configure it as a secondary:
# Configure BIND as secondary on New York server
sudo tee /etc/bind/named.conf.local <<EOF
zone "example.com" {
    type secondary;
    file "db.example.com";
    masters { 10.0.1.1; }; // Primary server IP
};
EOF

# Configure BGP with different router-id
sudo vtysh -c 'configure terminal' -c '
router bgp 65001
 bgp router-id 10.0.1.2
 neighbor 10.0.2.1 remote-as 64512
 neighbor 10.0.2.1 description "Upstream Provider NY"
 !
 address-family ipv4 unicast
  network 203.0.113.0/24
  neighbor 10.0.2.1 activate
 exit-address-family
'
Best Practices
Security Hardening:
- Configure BIND response rate limiting to prevent DNS amplification attacks
- Implement access control lists (ACLs) for zone transfers and queries
- Use TSIG keys for secure zone transfers between servers
- Configure firewall rules to restrict BGP and DNS access
Performance Optimization:
- Tune BIND cache sizes based on your query patterns
- Configure appropriate TTL values for different record types
- Monitor BGP convergence times and adjust timers if needed
- Implement DNS over HTTPS (DoH) for encrypted queries
Monitoring and Alerting:
- Set up comprehensive monitoring for DNS response times and BGP route announcements
- Configure alerts for health check failures and route withdrawals
- Monitor BGP peer states and route table consistency
- Track DNS query patterns and potential abuse
For enterprise deployments, consider the full observability stack to monitor your anycast DNS infrastructure effectively.
Conclusion
You’ve successfully built a production-ready anycast DNS infrastructure using BIND 9 and FRRouting BGP across two geographic locations. This setup provides automatic failover, health checking, and optimal routing for DNS queries.
Key achievements include:
- Redundant DNS resolution with automatic failover capabilities
- Geographic load distribution through anycast routing
- Health monitoring with intelligent route withdrawal
- IPv4/IPv6 dual-stack support for modern networking requirements
This anycast DNS setup significantly improves your service reliability and performance. For businesses requiring even more robust infrastructure, explore our Amsterdam VPS and New York VPS offerings with high-availability features and AMD EPYC Milan processors for optimal DNS query processing performance.
Consider expanding this setup with additional geographic locations or implementing active-active architectures for even greater resilience and performance optimization.